The Top Mitsubishi Galant VR-4 Resource

Join the best E39A 1991-1992 Mitsubishi Galant VR-4 community and document your GVR4 journey.

  • Software Upgraded - Reset Your Password to Login
    In order to log in after the forum software change, you need to reset your password. If you don't have access to the email address you used to register your GVR4.org account, you won't be able to reset your password. In that case, follow the instructions here to regain access to the forum.

New Owner of 1837/2000

Brett Adams' Galant VR-4

GSTwithPSI

Well-known member
Joined
Jan 1, 2012
Messages
3,461
Location
SoCal
Hey guys, thanks for all the compliments. I am pretty happy with the end result, and am at ease now that I know the car isn't rusting out from beneath me. I got the car all back together yesterday, and took it out for a drive. It was awesome to be back behind the wheel, and the car ran great. Special thanks to Charles for his great write up. I used his thread multiple times for reference, and it helped out a lot.

Also, Tom's recent videos were pretty inspiring, and seeing 1444 go from nasty to nice was great motivation! Now, I need to get under my own hood, and go from this:
IMG_6967.jpg


To this:
IMG_1207.jpg

Great work, Tom! It's crazy what some elbow grease and a few rags can do.
 
Last edited:

jogalant

Well-known member
Joined
Jul 28, 2005
Messages
1,180
Location
Central FL
Great work, man. Just great. You know the time-honored belief that when you love your ride it'll give it back to you in spades...... only motorheads understand this. Most women certainly don't. Beautiful job!
 

tektic

Well-known member
Joined
Dec 19, 2012
Messages
1,497
Location
ronkonkoma, ny
Oh wow. I did most of this but only to the nose and engine bay. I cringe to think this could be hiding under my moldings. /ubbthreads/images/graemlins/uhh.gif /ubbthreads/images/graemlins/uhh.gif

Looks done for you though !
 

GSTwithPSI

Well-known member
Joined
Jan 1, 2012
Messages
3,461
Location
SoCal
It has been nice the last few days, so I decided to drive the VR4 to work. As I backed the car out of the garage this morning, I noticed a small puddle in the floor. The car doesn't leak at all, so I immediately knew something was wrong. I shut the car down, and jumped out to go investigate. It was definitely oil. I didn't have time to dick with it, so I pulled it back in the garage and drove my other car.

I get home from work, and throw the car up on jack stands. I peek underneath to look for the leak, which I can now see is coming from between the oil filter and sandwich plate. I give the filter a twist and it comes off easy, but not so easy that it should be leaking. I think maybe it is a crappy seal. I grab a new filter off the shelf, and proceed to do an oil change. I go to screw on the new filter, and realize the damn mounting shaft that holds sandwich plate on is loose. I removed the shaft, and put some Loctite on the threads. I reinstalled it and snugged it up trying not to over tighten it. I finished the oil change and went for a test drive. The car didn't leak, and everything is fine again. I just thought I'd share, so maybe some of you guys can go check your oil filters /ubbthreads/images/graemlins/uhh.gif.

I hate the water cooler OFHs. I have a 90 OFH sitting in the garage, and I can't wait to install it. This little fiasco really got me thinking about getting an oil filter clamp. I just read in manikbastrd's thread the same exact thing happened to him, so how common is it for this to happen?

On an unrelated note, I decided to throw a COP setup I had laying around on the car. I noticed a vast improvement in my idle quality. I'm guessing that's a sign my plug wires are probably shitty. The car is running great on the COP though, so I think I'll run it for a while.
 

turbowop

Well-known member
Joined
Apr 29, 2001
Messages
11,972
Location
Yakima, WA
Now that it's loctite'd and properly torqued, it will most likely stay put for a long time. It's been over 20 years of that thing probably having overtightened filters on it. It's bound to come loose at some point. Mine did the same thing back in like '02. Red loctite and proper torque and it's been good ever since.
 

transparentdsm

Well-known member
Joined
Jul 27, 2011
Messages
3,690
Location
Cherry Hill, NJ
i added a COP setup on 138 and it did the same thing, car idles so much smoother and with the FIAV block off it really helps in the cold weather.

i don't know about the oil filter thing as i have a forward facing oil filter housing, it's almost impossible to remove the oil filter(4 out of 5 times i have to use a screw driver threw the filter) on both 138 and 1078 and no oil cooler on either car, but they aren't raced or driven all to hard and always turbo timed for 30 second minimum.
 

GSTwithPSI

Well-known member
Joined
Jan 1, 2012
Messages
3,461
Location
SoCal
Quoting turbowop:
Now that it's loctite'd and properly torqued, it will most likely stay put for a long time. It's been over 20 years of that thing probably having overtightened filters on it. It's bound to come loose at some point. Mine did the same thing back in like '02. Red loctite and proper torque and it's been good ever since.


Thanks, Mark, that's reassuring. I used the Red Loctite as well, so hopefully it is problem free from here on out. I've always had a 90 OFH on all my cars, so this is really my first time dealing with this specific issue.


Quoting transparentdsm:
i added a COP setup on 138 and it did the same thing, car idles so much smoother and with the FIAV block off it really helps in the cold weather.


Yeah, although the COP has some benefits, I still believe the stock ignition system is the superior of the two though. I just think my situation proves my ignition wires were probably worn out.
 

the_underdog

Well-known member
Joined
Dec 14, 2010
Messages
264
Location
Knoxville, TN
Quoting GSTwithPSI:
Also, Tom's recent videos were pretty inspiring, and seeing 1444 go from nasty to nice was great motivation! Great work, Tom! It's crazy what some elbow grease and a few rags can do.


Thank you for saying that and I'm glad I could help!
 

GSX_TC

Well-known member
Joined
Apr 7, 2011
Messages
3,725
Location
Houston, Texas
dam thats a clean engine bay!
 

GSTwithPSI

Well-known member
Joined
Jan 1, 2012
Messages
3,461
Location
SoCal
So, got my short shifter from JNZ last week and got a chance to install it today. Let me just start by saying the shifter JNZ has put together is PERFECT in every way. Fit and finish are flawless, and it was shipped with everything needed to install.

As far as the install goes, it was plug and play. I took the old stocker out, and the shorty dropped right in. I didn't even have to remove the center console. The only modification I had to make was to the underneath plastic that holds the shifter boot in place. The plastic trim ring impedes the lateral movement of the lower profile pivot assembly. I trimmed away a small section, and everything worked perfectly.

My first impression after the install was amazing. As expected, the throw is significantly shorter, and the shifter just feels tighter all together. I haven't gone for a drive yet, but I expect good things when I take the car out later. The factory shift boot did fit, but I don't really think it looks right. The shifter I got was the standard length GVR4 option, and if the shifter stalk were any shroter, I'm not sure you would be able to still utilize the stock boot. It would also depend on your shift knob as well, as the one I have attaches below the actual threads on the shifter stalk.

Overall an great modification. Thanks to all the guys at JNZ for a great item, and also to Chris (89Mirageman) for rounding up enough parts to make this happen for a few lucky members here on the board.

Here's a side-by-side; stock GVR4 shifter (left) and the JNZ short shifter (right). Notice the nice powder coated finish on the JNZ shifter, as well as the different pivot points:
WP_000584.jpg

WP_000585.jpg


Here's what I was talking about with the trim ring. You can see the shifter contacting the side:
WP_000586.jpg


I trimmed a small area, and the shifter worked great:
WP_000589.jpg

WP_000590.jpg

WP_000588.jpg


Finished product:
WP_000591.jpg

WP_000593.jpg

WP_000596.jpg

WP_000597.jpg

WP_000598.jpg
 

EHmotorsports

Well-known member
Joined
Sep 25, 2012
Messages
1,278
Location
Beaverton
I'm not putting the shifter down at all. But the reason the fit is so good is because it's a factory 3000gt peice with some bushings made.
 

DSSA

Well-known member
Joined
Apr 16, 2002
Messages
579
Location
PA
Yes, it's based on the 3KGT shifter, but no, not just bushings.
 

EHmotorsports

Well-known member
Joined
Sep 25, 2012
Messages
1,278
Location
Beaverton
I wasn't hear to sh*t on your Parade but I know what is involved in the process. yes you powder coat and for DSM's you will cut down and weld the shifter rod. but the basics are the basics. Im not saying the shifter is crap because it is the best option on the market and it is priced good for people that do not want to make all the bushings and spacers.
 
Last edited:

DSSA

Well-known member
Joined
Apr 16, 2002
Messages
579
Location
PA
I'm not saying that you are, but it's not a matter of just making bushings and popping them in.

After building several hundred over the years, I think that I have a wee bit of knowledge on them.

It's not a highly complex conversion, but yes, you're over-simplifying it a bit.

Since you've told me what your intentions and reasons for posting are not, maybe you could clarify what they are?
 

EHmotorsports

Well-known member
Joined
Sep 25, 2012
Messages
1,278
Location
Beaverton
I am sorry if you feel I am over simplifying the process but it IS that simple. its not hard. Please don't try to make it seem like you are making rocket fuel when really you're only making a pointy stick. you can try to argue this if you want but I suggest we quit shitting up the OP's thread and you can give me a call or PM me if you would like to further this discussion.

here is a link to what one of the guys here did.
click
 
Last edited:

DSSA

Well-known member
Joined
Apr 16, 2002
Messages
579
Location
PA
I'm still not understanding your intentions for posting what is already common knowledge and posted openly on our website.

As evident in the thread from '09 that you provided, it's not "just a couple of bushings". As for the "pointy stick" that you obviously feel we overcharge for, I wish to subcontract work to you Evan, as obviously you're a man who feels they shouldn't be paid for their time and research.

Here's the breakdown of the killing we make on these things.

--We paid $30/each for the base parts due to the generosity and help of Chris here on the board.
--The OEM bushings used in each are $6
--The adapter bushings run us $4.75/each when we have them cut in bulk (this is not including the stick of Delrin itself)
--The pins that we replace the lower shift pin with costs us $2.10/each
--The shift cable retaining pin costs us $.42/each
--The assembly hardware (nuts/washers/shims) run us $2.78

So in parts *we* spend $50.80 to build each.

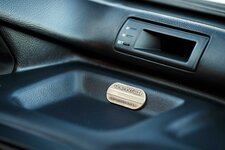
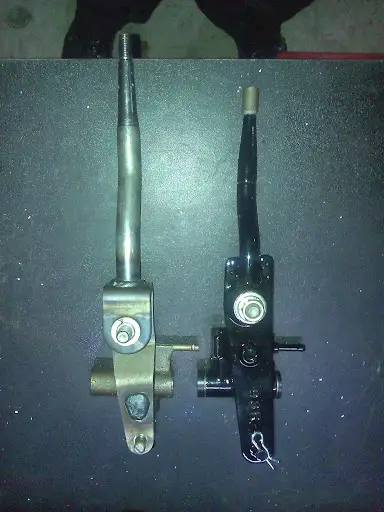
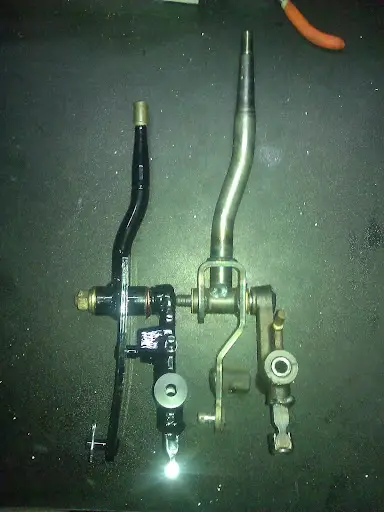
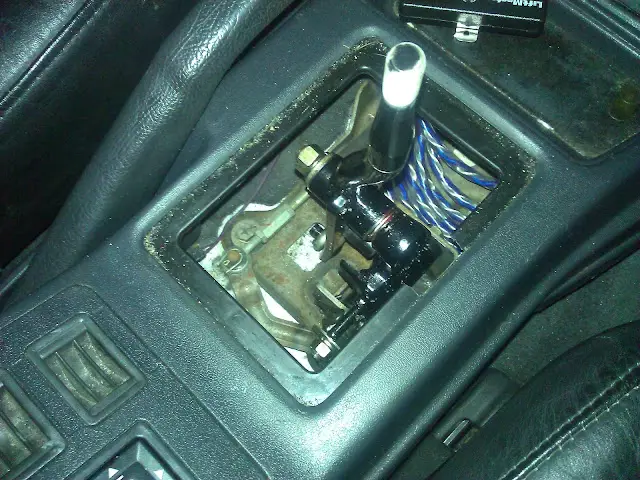
It takes me about an hour an 1/2 to build each shifter (including cleaning, blasting, removing old pin/welding (both sides) of new pin, re-blasting the weld area, off-setting the lower for clearance, powder coating, assembling and greasing, and then some times making adjustments to the shimming for the upper).

So, that's $62.80/hour if we're selling the parts at our cost with 0% ROI for the parts. Our shop rate is $90.00/hour.

You've stated that you're not here to "sh*t on our parade", yet you're not stating what your purpose is of posting your initial statements. If it's not to be abrasive, then it's because you think we're over-valuing our product (which I've shown in the above to be a highly debatable stance), or because you're enlightening us with your obvious wealth of knowledge on the subject ("just two bushings", which as I said is over simplifying it, and you've proven it by providing your own link to a thread that's been public since '09) and want some sort of recognition? If that's the case, I suggest that you purchase the equipment and supplies, build a better shifter and bring it to market. I not only suggest this, but encourage it as we're pretty much at the end of the line with these shifters--I'd like to see a viable option for the future.

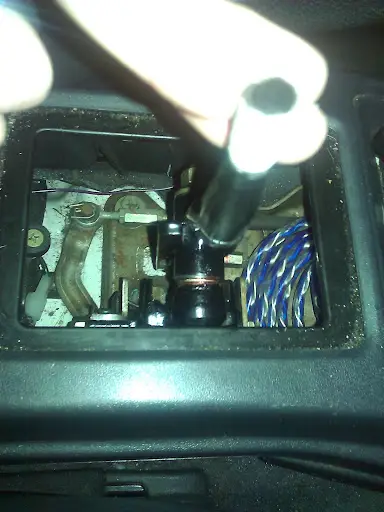
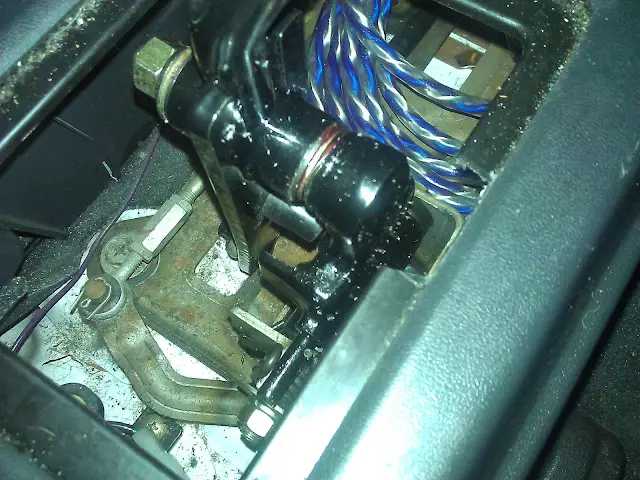
"It should fit well, considering it's just a modified 3KGT shifter".

I suppose our/Shep's/TRE's/Jack's transmissions "Should run well, since they're just modified factory transmissions with other factory parts swapped in".

I invite you to explain the reasoning behind your posts in this thread via PM or publicly in another thread.

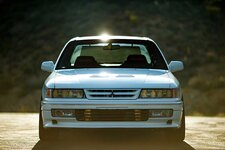
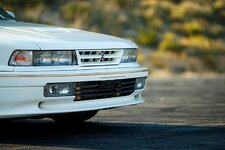
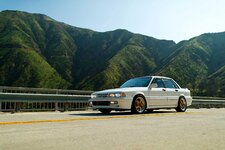
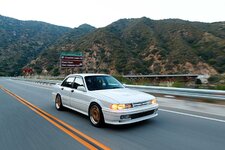
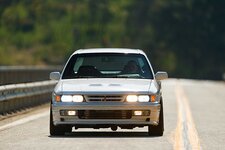
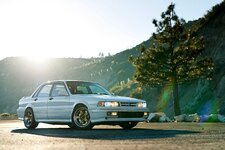
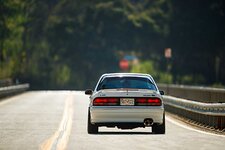
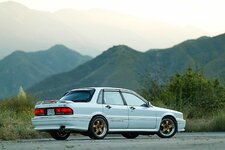
Brett, my apologies and thanks for your indulgence--the car looks great!
 

EHmotorsports

Well-known member
Joined
Sep 25, 2012
Messages
1,278
Location
Beaverton
I think you need to take a step back and calm down. like I posted before that this is the best shiftier on the market and it is priced right. I wasn't being sarcastic. And again it is very easy to make a 3kg shifter work in a gvr4 or dsm. that's it! No ulterior motive pal. You didn't reinvent the wheel and if you feel this isn't an easy job then you need to expand your fabricating skill set. entry level at best.
 
Last edited:

EHmotorsports

Well-known member
Joined
Sep 25, 2012
Messages
1,278
Location
Beaverton
o an on your shop rate. you pay those guys 11-15 an hr you are making plenty don't give me that crap.
 
Support Vendors who Support the GVR-4 Community
Boosted Fabrication ECM Tuning ExtremePSI Fuel Injector Clinic Jacks Transmissions JNZ Tuning Kiggly Racing Morrison Fabrications RixRacing RockAuto RTM Racing STM Tuned
Top